Download and Build Corda Example Project
- Reading time: 30 mins
- Discuss on Slack
A Corda project can become a big beast with many moving parts. Before you learn how to build a project from scratch, you can explore a functional one prepared for you by the Corda team.
In this section, you will do the following:
- Load an example project into IntelliJ.
- Walk through the code.
- Pick up tips on how to use IntelliJ on a Java project.
The example project - IOUs
This section is all about IOUs. That’s what the cordapp-example does. It creates IOUs. That’s all. This may sound limited but there is plenty to get acquainted with and it is best to avoid the mental overhead of a complex application.
You will use this project and follow its guidelines, and get pointers on what’s happening in the code.
Prepare the Project
This section is inspired by the tutorial found on docs.corda.net here.
It’s time to download your CorDapp example. Go into your workspace directory, or wherever you want to clone the repository:
$ cd Workspace
$ git clone https://github.com/corda/samples-java.git
This samples repository contains a lot of example projects, however you will focus only on cordapp-example. To ensure your version matches this training, you need to add an extra step:
$ cd samples-java/cordapp-example
$ git checkout cf21fb3dbf9972d61eb9b543e6fe79698f843110
You have now cloned the project to your local storage and then changed to the version that was used for the production of this training. This eliminates the possibility that late-breaking changes could lead to confusion as you work through these exercises.
Now you are ready to start working with the code in IntelliJ.
Open the Project
The Java Integrated Development Environment (IDE) named IntelliJ will assist you in navigating the code with simple clicks and hints. This is much easier than navigating code on Github. Links are still provided to the code on Github to help you identify where the code is located. This is because it’s not possible to link to code inside IntelliJ.
The easiest way to open the project with IntelliJ is:
-
Open IntelliJ.
-
Click on the menu File -> Open.
-
Navigate to the
cordapp-examplefolder. -
Select the root
build.gradleproject file.

-
Click Open.
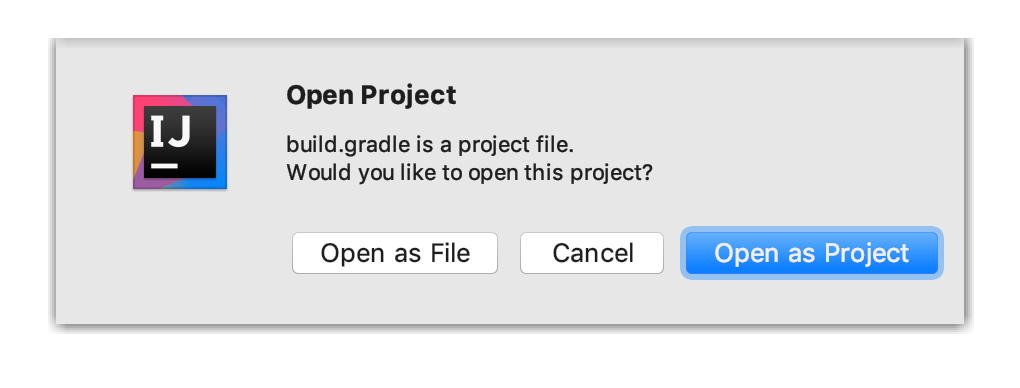
A popup appears. -
In the popup, click Open as Project.
As the project is loading, a pop-up menu appears in the lower right corner:
-
Click on Import Gradle project and let it finish, and that’s it!
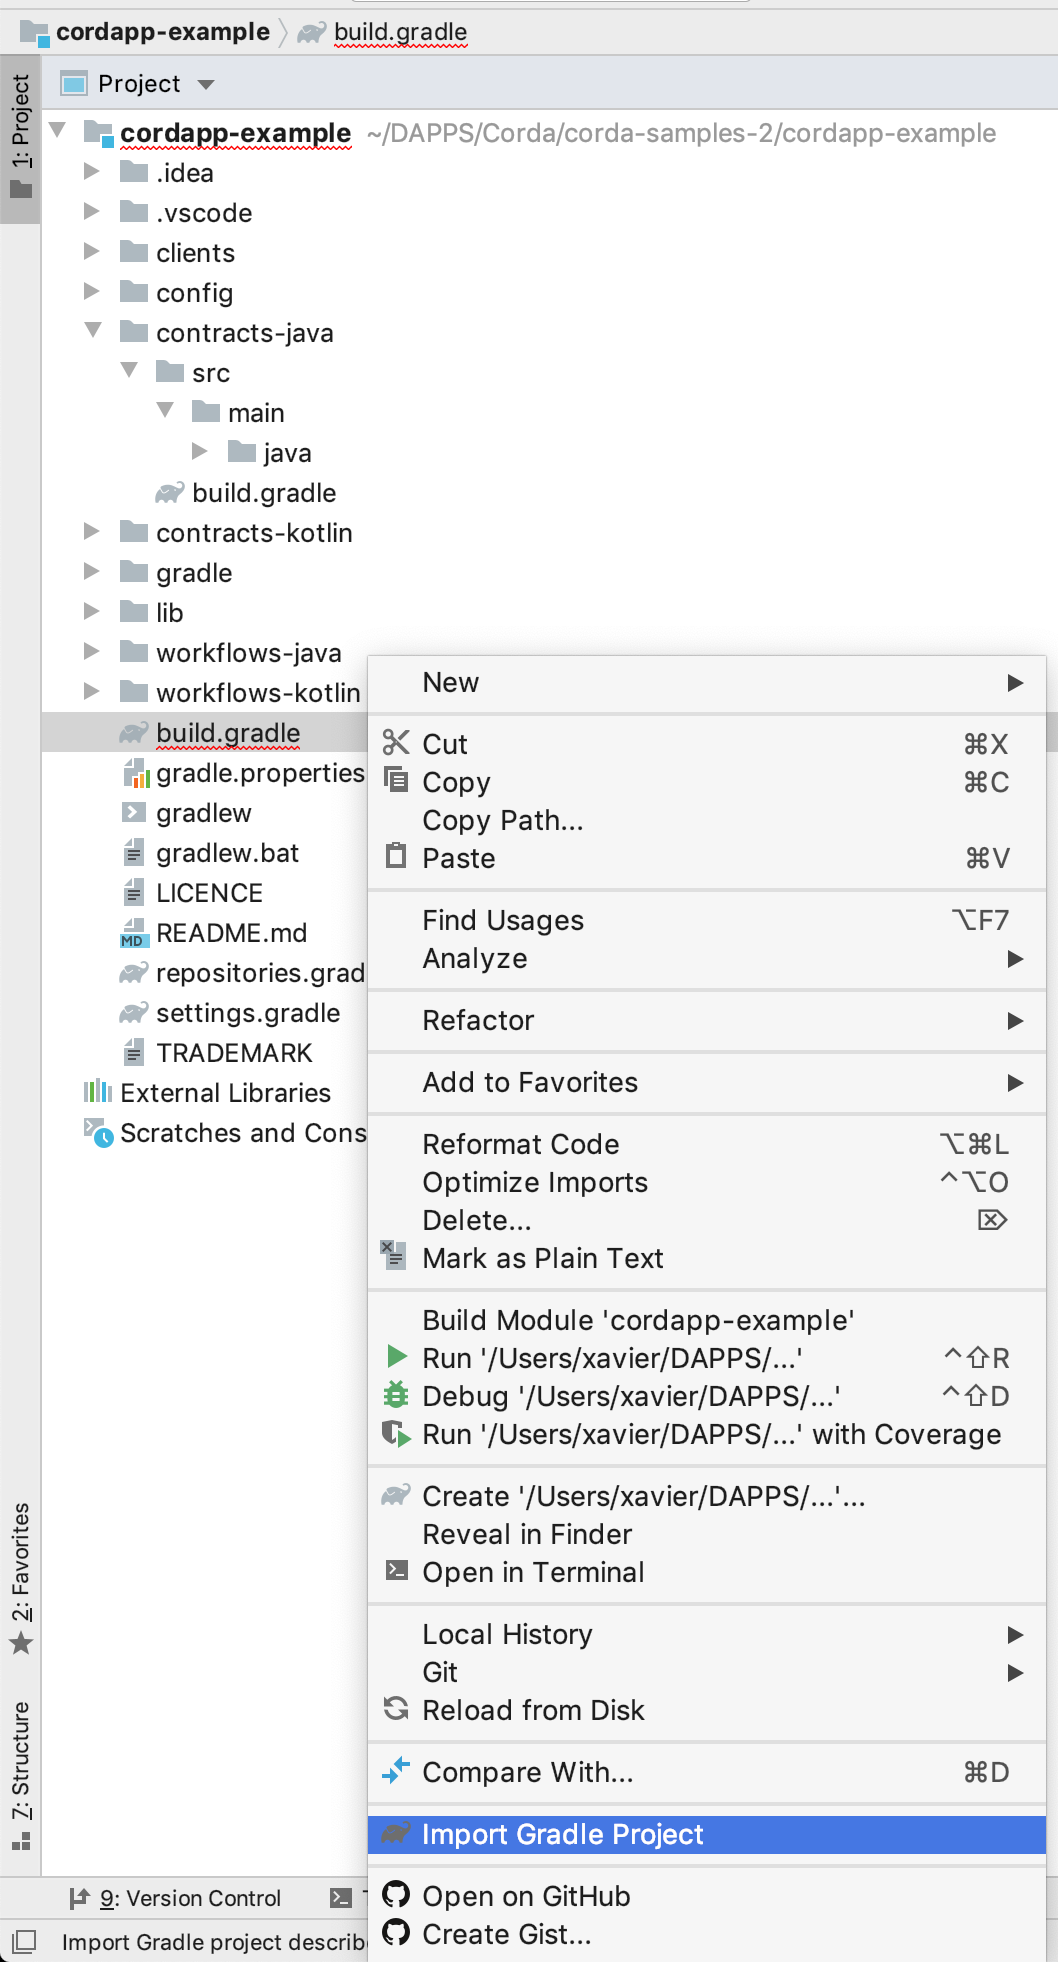
If you overlooked the transient Import Gradle Project seen above and you are faced with a bland looking project, despair not. Simply:
- Find that top
build.gradlefile. - Right-click it and choose Import Gradle Project again:
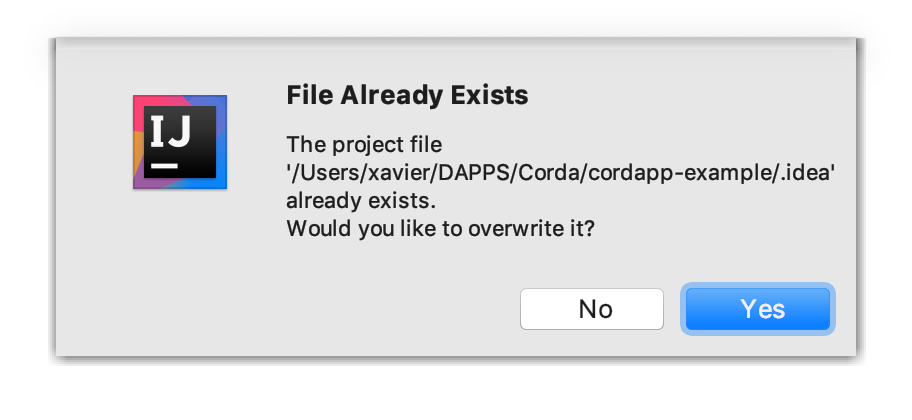
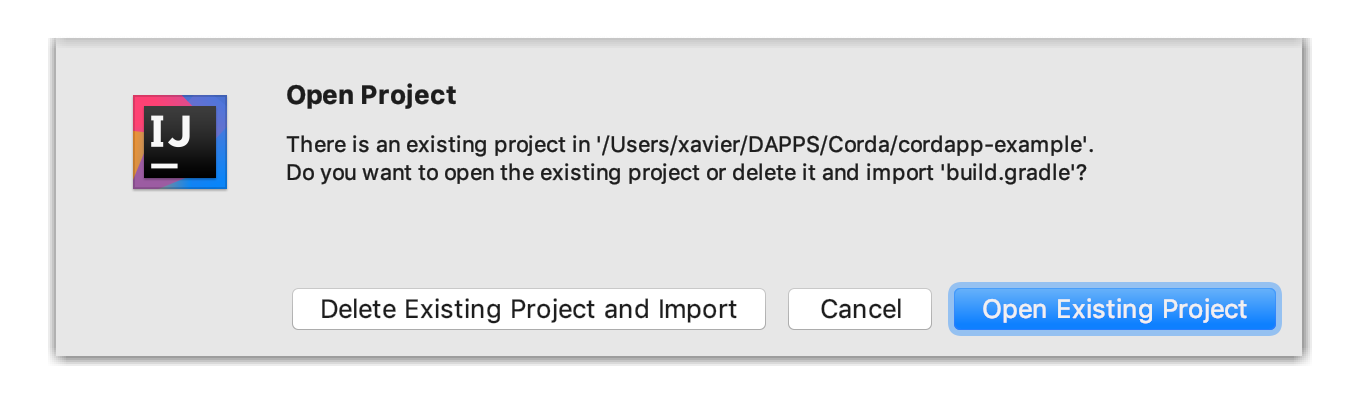
If for some reason you had already opened it previously and you did those import steps again, you need to accept to overwrite the existing configuration. The buttons to click are circled in blue:
Be patient as it may take a couple minutes for IntelliJ as it is:
- Downloading the project’s dependencies.
- Indexing the code so as to help you with navigating it.
Gradle is a versatile project management tool, which of course includes dependency management. Admittedly, there may be as few as 3 people in the whole world who fully understand how it works and what it is doing but it works for your purpose. Regrettably, there is no auto-completion for Gradle commands.
You group your Gradle commands into 1 or more build.gradle files, which can call other build.gradle files. What you did earlier is select the root Gradle file.
IntelliJ knows how to interact with Gradle, thanks to a plugin, so when you clicked on build.gradle, you told IntelliJ to delegate the project management to Gradle. Which it did.
The cordapp-example project contains 6 build.gradle files in total:
build.gradleclients/build.gradlecontracts-java/build.gradleworkflows-java/build.gradlecontracts-kotlin/build.gradleworkflows-kotlin/build.gradle
build.gradle is called the root file. All 5 other build.gradle files incorporate what is done in this root build.gradle. For instance, contracts-java/build.gradle knows about the root build.gradle. In fact, a given build.gradle automatically incorporates what other build.gradle files did higher in the folder structure. You can see an example of that here, where corda_release_group is defined up in the root, there.
Not down the tree. Not sideways either. For instance, contracts-kotlin/build.gradle does not incorporate what was done in contracts-java/build.gradle.
The 5 folders:
clientscontracts-javaworkflows-javacontracts-kotlinworkflows-kotlin
Are called Gradle modules. They each encapsulate a piece of logic of the whole project. Not just any old folder can become a module. You need to direct Gradle to them in settings.gradle.
A module can reuse logic from another, which has to be made explicitly. Which is why, as expected:
-
workflows-javadepends oncontracts-java. -
workflows-kotlindepends oncontracts-kotlin.
As you quickly look around notice how there are sources folders for:
These 4 different source folders actually code roughly the same thing. They are here to show you how you would accomplish the same tasks in either language. Obviously, when you do your own project, you need not create 2 versions of the same thing. You only need to create projects once in the language of your choice.
In fact, in this example app, it is as if you had 2 independent examples in 1 folder. You can confirm this by looking at:
workflows-java’sbuild.gradle’s dependency:cordapp project(":contracts-java")workflows-kotlin’sbuild.gradle’s dependency:cordapp project(":contracts-kotlin")
Ok, enough about loading and configuration. Let’s dive in:
The Corda objects
Let' u’s look at the data structures you learned about in a previous chapter.
State
The project defines an IOUState in Java and Kotlin:
public class IOUState implements LinearState, QueryableState {
    private final Integer value;
    private final Party lender;
    private final Party borrower;
    private final UniqueIdentifier linearId;
data class IOUState(val value: Int,
                    val lender: Party,
                    val borrower: Party,
                    override val linearId: UniqueIdentifier = UniqueIdentifier()):
        LinearState, QueryableState {
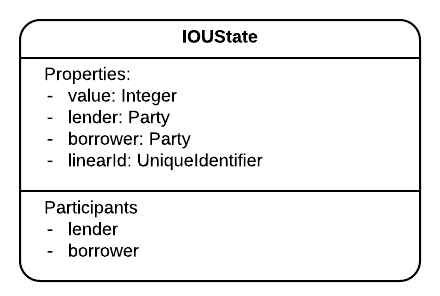
In case it is not clear, IOU is short for “I owe you (money)”. The IOUs in this example have four properties:
- 2 parties:
lenderandborrower, - 1
value, - and 1
id.
The Parties
Let us take a quick look at the parties.
-
Party: Bothlenderandborrowerare of typeParty. If you look atParty’s definition, it starts to get a bit cryptic, with its default constructor. In essence, it is a pair made of:- a
CordaX500Name, a.k.a. a name, - and a
PublicKeyinterface.
class Party(val name: CordaX500Name, owningKey: PublicKey) : Destination, AbstractParty(owningKey) {` - a
-
CordaX500Name: If you follow again insideCordaX500Name, you will see here that it identifies the legal name of an entity (e.g"CN=Alice Corp,O=Alice Corp,L=London,C=GB"). For now, let’s not dig any further.data class CordaX500Name(val commonName: String?, val organisationUnit: String?, val organisation: String, val locality: String, val state: String?, val country: String) { -
AbstractParty: That isParty’s parent class and it is interesting to notice its@CordaSerializableannotation, which makes sense because this is information that will be exchanged between nodes.@CordaSerializable
Value
Back to IOUState.
Little is said about value other than it is an Integer. What is not said is noteworthy. It is not limited to positive values. This constraint will be found elsewhere. This was a design decision on the part of the Corda team, in order to organize constraints in one place rather than having them scattered across various constructors.
Linear Id
For IOUState to be usable as a state on the ledger, it would have sufficed for it to implement ContractState, which, you will notice is also @CordaSerializable. However, so as not for us to reinvent the wheel, the Corda team has already prepared a number of implementations that can assist us with simple cases. These are part of the list of things that R3 is doing to increase the productivity of developers. To see a list of implementations of ContractState in IntelliJ:
-
Open
IOUState. -
Command-Click or Control-Click on
LinearState: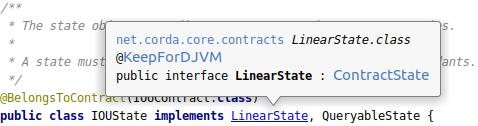
-
It opens
LinearState. Same here, you Command-Click onContractState:
-
It opens
ContractState, then on the left, click the small greenI: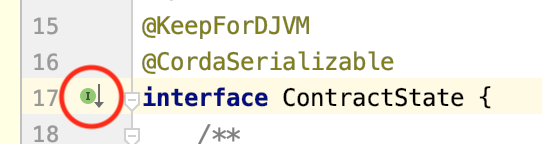
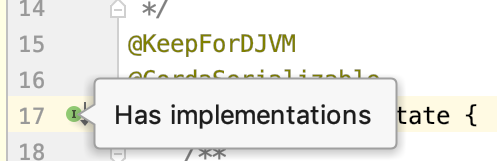
-
You get a drop-down of implementations:
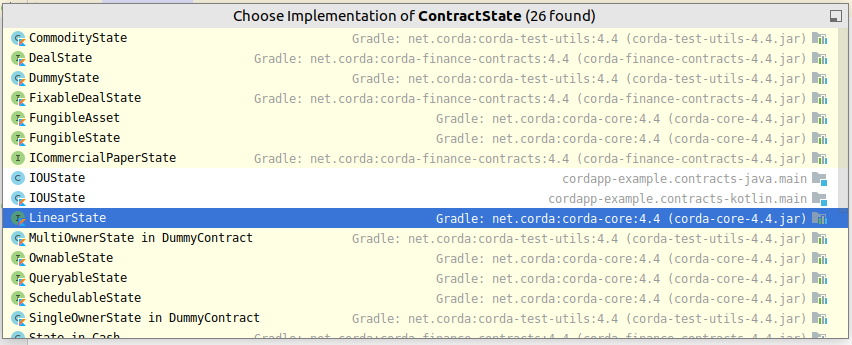
interface LinearState, which offers a rudimentary way to identify successor states by way of the linear id. This linear id is meant to be unique. So when you use LinearState, it is incumbent on you, the developer, to make sure that you do not have 2 unconsumed states with the same linear id at any point in time. It is also incumbent on you to make sure that successor states have the same linear id as the states they replace. Doing otherwise defeats the purpose of LinearState.
Schema
States can be persisted in node vaults by various methods:
- Embedded in a known transaction. This is unavoidable if the node receives a signed transaction and saves it to transaction storage. An output state is part of the serialized blob of the transaction in any case. For this reason, when a node receives a transaction you can consider that its output states have been disclosed.
- Stored as a discrete state. This is automatically done by the node when it receives a transaction that mentions one of its public keys as a participant. Presumably, the node, its owners or its customers are meant to retrieve and use it.
- Stored as a row in a custom SQL table in the node’s vault. This is done explicitly by the CorDapp’s developer. Doing so enables the option of running complex queries on known states.
Understand that:
- When it is stored in fashion 3, a state is also stored in fashion 2.
- And, when it is stored in fashion 2, it is also stored in fashion 1.
As a matter of fact, for this project, a decision was made to save IOUStates in their own custom vault table. This is not a necessity but this example is meant to show you methods that are available to you. To achieve it, all that had to be done was to declare that IOUState as a QueryableState and specify the ORM model to use.
public class IOUState implements LinearState, QueryableState {
data class IOUState(val value: Int,
        [...]
        LinearState, QueryableState {
and the necessary implementation:
@Override public PersistentState generateMappedObject(MappedSchema schema) {
    if (schema instanceof IOUSchemaV1) {
        return new IOUSchemaV1.PersistentIOU(
                this.lender.getName().toString(),
                this.borrower.getName().toString(),
                this.value,
                this.linearId.getId());
    } else {
        throw new IllegalArgumentException("Unrecognized schema $schema");
    }
}
override fun generateMappedObject(schema: MappedSchema): PersistentState {
    return when (schema) {
        is IOUSchemaV1 -> IOUSchemaV1.PersistentIOU(
                this.lender.name.toString(),
                this.borrower.name.toString(),
                this.value,
                this.linearId.id
        )
        else -> throw IllegalArgumentException("Unrecognized schema $schema")
    }
}
Moving on.
Contract
The contract will ensure that an IOUState will transition as per the following state machine view:
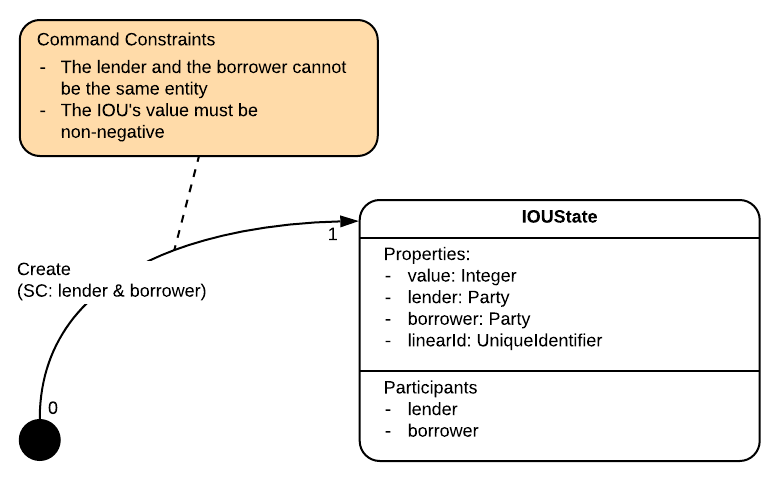
Where SC: is short for Signing Constraints.
The project defines an IOUContract in Java and in Kotlin. For it to be usable on the ledger as a contract, it has to implement the Contract interface:
public class IOUContract implements Contract {
class IOUContract : Contract {
Notice how IOUContract.ID repeats information about itself - its fully qualified name. When you build a transaction and add a state to it, you will associate a contract to a state by way of this fully qualified name. If you are so inclined, you can use some reflection instead:
public static final String ID = IOUContract.class.getCanonicalName();
val ID = IOUContract::class.qualifiedName!!
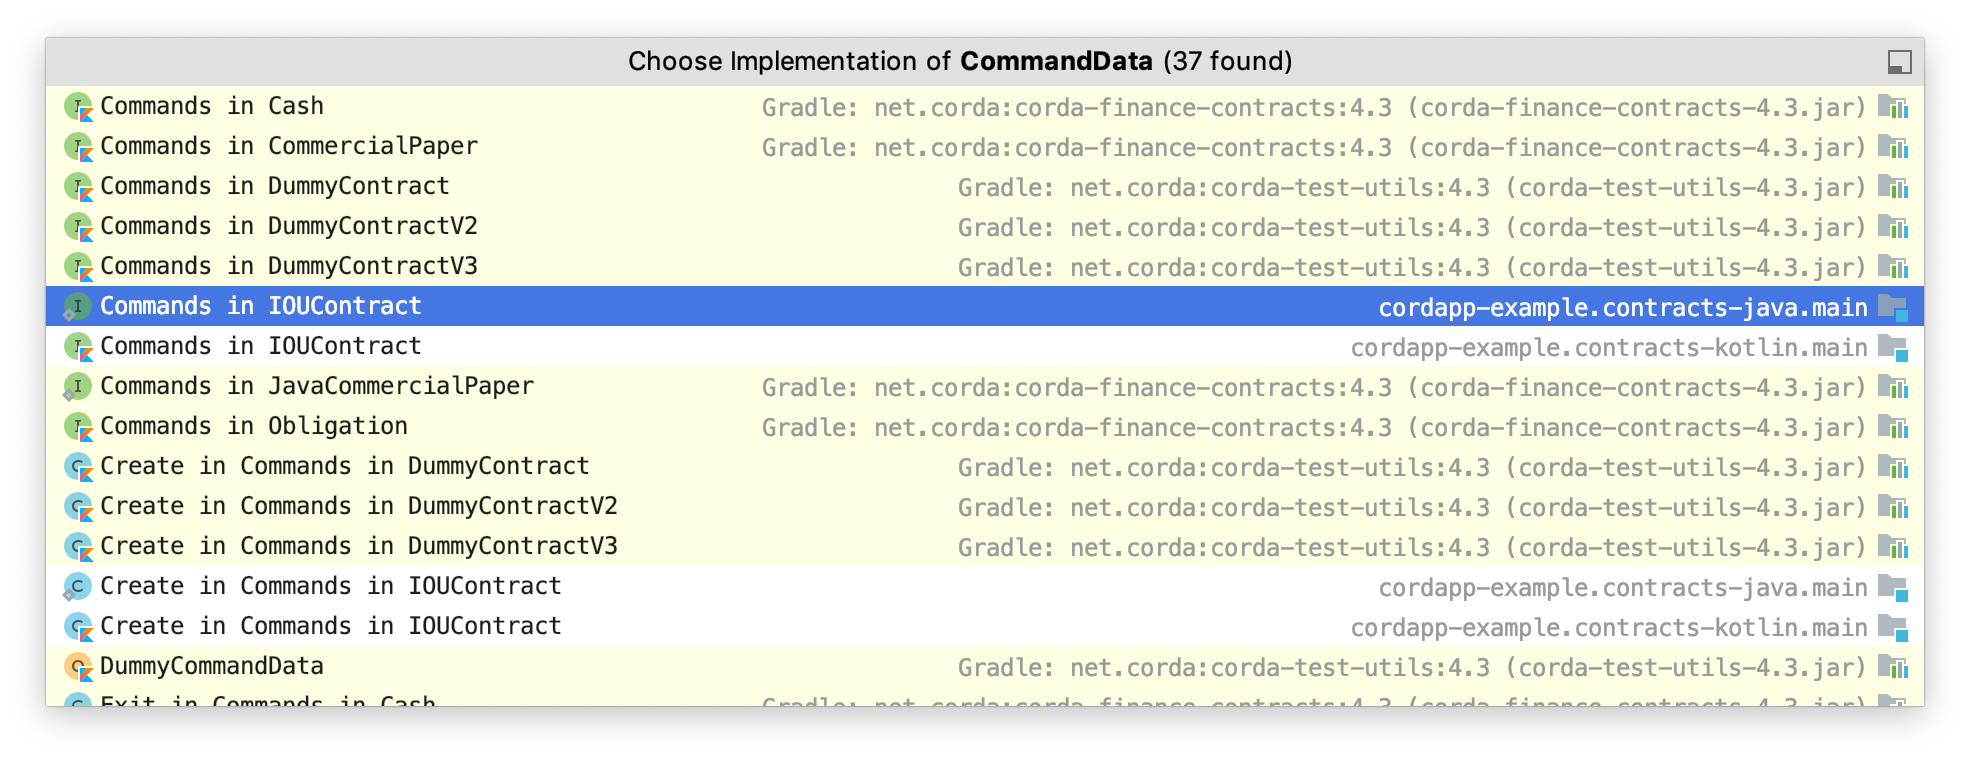
Command
Remember that commands define intent. The only command available in this project is Create. It could have been defined anywhere. The design decision was to encapsulate it inside IOUContract. Once more, if you Command-Click to CommandData, notice how it is @CordaSerializable as this will also be serialized as part of the transaction.
public interface Commands extends CommandData {
    class Create implements Commands {}
}
interface Commands : CommandData {
    class Create : Commands
}
These nested classes are merely marker interfaces in this instance, marker in the sense that they do not declare any function. They can also declare fields, as you shall see in later chapters. As with states, the Corda team has created further command implementations (Click on the green I on the left):
Verify
As this is what contracts are supposed to do, it implements a verify(tx) function. If the contract wants to reject a transaction, all it has to do is throw an exception. If it does not throw an exception, then it accepts the transaction.
public void verify(LedgerTransaction tx) {
    final CommandWithParties<Commands.Create> command = requireSingleCommand(tx.getCommands(), Commands.Create.class);
    requireThat(require -> {
        // Generic constraints around the IOU transaction.
        require.using("No inputs should be consumed when issuing an IOU.",
                tx.getInputs().isEmpty());
        require.using("Only one output state should be created.",
                tx.getOutputs().size() == 1);
        final IOUState out = tx.outputsOfType(IOUState.class).get(0);
        require.using("The lender and the borrower cannot be the same entity.",
                !out.getLender().equals(out.getBorrower()));
        require.using("All of the participants must be signers.",
                command.getSigners().containsAll(out.getParticipants().stream().map(AbstractParty::getOwningKey).collect(Collectors.toList())));

        // IOU-specific constraints.
        require.using("The IOU's value must be non-negative.",
                out.getValue() > 0);

        return null;
    });
}
override fun verify(tx: LedgerTransaction) {
    val command = tx.commands.requireSingleCommand<Commands.Create>()
    requireThat {
        // Generic constraints around the IOU transaction.
        "No inputs should be consumed when issuing an IOU." using (tx.inputs.isEmpty())
        "Only one output state should be created." using (tx.outputs.size == 1)
        val out = tx.outputsOfType<IOUState>().single()
        "The lender and the borrower cannot be the same entity." using (out.lender != out.borrower)
        "All of the participants must be signers." using (command.signers.containsAll(out.participants.map { it.owningKey }))

        // IOU-specific constraints.
        "The IOU's value must be non-negative." using (out.value > 0)
    }
}
Let’s explore some constructs before coming back to the code above with explanations.
requireSingleCommand
As the name suggests, it extracts a single command from the transaction. Of note is that:
- It expects to be given the type of command to find, here
Commands.Create.class. Passing a less preciseCommands.classwould work too. - It throws if none can be found, expressed in the
requirewording of the function. - It throws if more than one is found, expressed in the
singlewording.
requireSingleCommand is in fact part of a wider set of utilities, the Contracts DSL.
ContractsDSL
Notice requireThat, which is not a Java or Kotlin word but instead part of a Domain-Specific Language (a.k.a. DSL) created by Corda to increase the expressiveness of your code, if not the mechanisms enabling it… requireThat, when used in Kotlin, is more succinct than when used in Java.
To achieve this syntactic sugar, requireThat uses 3 of Kotlin’s quirks whereby:
- you can have
infixfunctions, likeusing, which makes it possible to haveusingbe used as a member function without its preceding dot, i.e..using, or its following(, i.e.using(. Try it (in Kotlin), add a.before one of theusing, it does not change anything. Also try wrappingusing’s argument in( ). - when the last argument of a function is a lambda function, the lambda body can be moved out of the parentheses. That is why you do not see the
(inrequireThat ({. - similarly to C# you can add
extension methodsa receiver type to functions. This is howusingis added as a member function to theStringtype via its declarationString.using(. The receiver type is also used withinrequireThat’s parameter such that the callback namedbodyis interpreted as run within aRequirements, making theusingfunction readily available inside the body ofbody.
Also note that .using( is an inline function, which means that the function’s code is “copied” in its destination instead of being called up as a function. This is beneficial, otherwise, via the stacktrace, the exception thrown would always originate from ContractsDSL.kt, which is obfuscating, not informative.
Ok, stepping out of the rabbit hole.
Why go through all this trouble when the Java syntax is not necessarily the most expressive? It removes the visual noise of the usual pattern, e.g. if (!happy) { throw new IllegalArgumentException("why not"); } and it lets you focus on the important elements of the constraints: happy and "why not". The Corda team themselves are big users of Kotlin, so they benefited from their own efforts.
Other points
Do not miss the Java static imports. IntelliJ may fold the code near line 3. Expand the fold to reveal important dependencies.
import static net.corda.core.contracts.ContractsDSL.requireThat;
import net.corda.core.contracts.requireThat
A couple of notes about the requirements in the verify function:
-
It was mentioned earlier that the
IOUStatedid not itself ensure that thevalueis strictly positive. You now see that it is enforced here, in theverifyfunction, among all other constraints. -
It is very restrictive in that it requires:
- a single IOU Create command,
- absolutely no inputs
- and a single output which must be of IOU type.
Note that the contract still allows a transaction where another non-IOU Create command is present. This is welcome. It means you could hypothetically mix this contract with a Token state and contract. The Token would be the owed value of the “I owe you” idea. Indeed, you may want to create the IOU state at the same time you transfer some tokens in an atomic way. To make this possible, the restriction on inputs and outputs would have to be adjusted so that the IOU contract only checks the
IOUStates. In effect:require.using("No IOU inputs should be consumed when issuing an IOU.", tx.inputsOfType(IOUState.class).isEmpty()); // Notice inputsOfType, which allows you to only select the type you care about. require.using("Only one output state should be created.", tx.outputsOfType(IOUState.class).size() == 1); // Notice outputsOfType, which allows you to only select the type you care about."No inputs should be consumed when issuing an IOU." using tx.inputsOfType<IOUState>().isEmpty() // Notice inputsOfType, which allows you to only select the type you care about. "Only one output state should be created." using (tx.outputsOfType<IOUState>().size == 1) // Notice outputsOfType, which allows you to only select the type you care about.
Doing so would signal that this contract only cares about its states, in effect delegating the control of the Token states to the Token contract. -
Both the Java and Kotlin versions make assumptions on outputs size and then getting the first, or only, state. However they awkwardly make those assumptions on different lists. The size is checked on the absolute list of outputs here and there. This absolute list of outputs contains
IOUStates and states of other types. So when the first element is taken in Java on the modified list ofIOUState, this modified list may well be empty, and the.get(0)yield anIndexOutOfBoundsException. Similarly in Kotlin, the only element is taken on the modified list, which may well be empty. An improvement to both contracts would be to make sure the size is checked on the modifiedtx.outputsOfType<IOUState>()list as seen on the samples above. This improvement would yield more intelligible error messages on invalid transactions. -
Notice how the command is picked at the beginning of the
verifyfunction. If the command is missing or there is more than one of this type, it will fail. Notice too how the require was onCommands.Create.class, this means that if you want to add other commands to your contract, in order to signal other intents, then you will need to revisit this line and use the parent classCommands.classinstead. This should become clearer when you code, in the next module. -
Finally, it requires that the participants need to
have signed offbe marked as signers on the transaction. Correct, the contract does not check the signatures. Instead the transaction, via the commands, hereCreate, informs which signers are required and the contract checks that the expected signers are listed, and then only the Corda system makes sure that the signatures of the required signers are present before accepting a transaction as final. Belaboring the point, the contract verifies who needs to have signed off, it does not verify the signatures. Verifying the signatures, and verifying that all the required signers have indeed signed is the purview of the Corda framework, before it commits the new transaction to the node’s ledger. What was the rationale behind asking both participants to sign?- asking the borrower is absolutely necessary. After all, this IOU is a liability for the borrower, so you need to confirm that the borrower is ok with acquiring a new liability. Otherwise it would be too easy to just drop IOUs on rich people. IOU printer go brrrr
- asking the lender is less clear-cut. After all, the lender gains an asset, the future value that the borrower is promising to return. Who would reject helicopter money? On the other hand, entering an IOU may be legally binding, or may have tax implications, which both represent a liability for the lender. Since that is the case, the lender signature should be required. Additionally, as this is an example CorDapp, there was a desire to demonstrate a flow that requires signing from a counterparty.
In effect, the contract is in charge of validating transitions of the state machine. Valid transitions are expressed in the following diagram:
Where SC is short for Signing Constraints.
Finally the Contract interface, it too has some available implementations:
Flow
You have learned that flows encapsulate a piece of the business process. They can be used to create valid transactions agreed between parties. Note the wording in the previous sentence: can be used. Indeed, although a flow encapsulates a piece of the business process, creating a signed transaction is only one of the business processes an organisation implements. Admittedly an important one.
In the process of our example, there are 2 parties, the lender and the borrower, and they both need to sign off, a.k.a. agree, on the transaction proposal. They want to arrive at a consensus and achieve this state evolution:
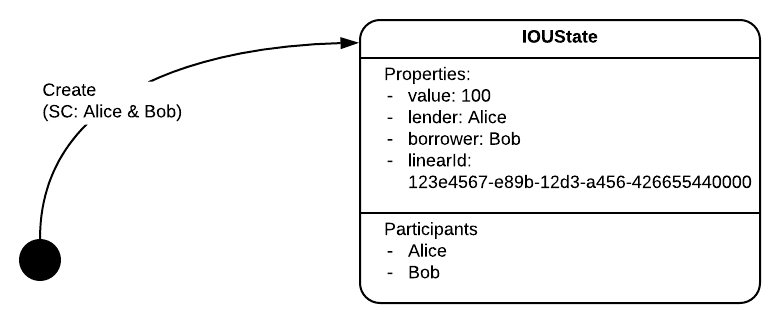
Note the difference from the previous state machine view, seen before. Here, a single state evolution is expressed, one that reaches a state with well-defined values.
To achieve this consensus, the flow goes through a number of steps:

As you will see later, it was a design decision to have the lender initiate the process and for the borrower to then accept the transaction proposal. The back and forth business process is expressed in:
- The
Initiator extends FlowLogic<>, which, you will notice is annotated with@InitiatingFlow. - The
Acceptor extends FlowLogic <>, which is annotated with@InitiatedBy(Initiator.class).
In other flow examples you will often see this initiator / responder naming convention.
About the Flows
Both classes could be in their own file, and it was again a design decision to encapsulate both as static classes inside a class for Java, or in a singleton object for Kotlin. Also, it is not immediately apparent that it is the lender that needs to initiate the process, this detail reveals itself in the code.
await that should be familiar to you. To indicate to Quasar that a given function’s body can be checkpointed mid-flight, the function’s declaration needs to be annotated with @Suspendable. And you see that both Initiator and Acceptor have this call() function that is suspendable.
A typical reason for flow suspension is when it expects to receive something. At this point, it is suspended, and will be resumed when there is something to receive indeed.
Since a flow can be suspended, there is a mechanism that lets observers know at what stage the flow is. That is the role of the progressTracker. Before and after checkpoints, or any other point really, it can be updated with a descriptive state.
When a flow is suspended, it frees the thread on which it was running. This available thread can be used by a brand new flow, or a suspended one whose revival conditions, have been met such that it can now continue. If not, the thread remains unused until such case arises. This should remind you again of co-routines, which pop in and out of threads are suspended and resumed on the same or another thread.
The Initiator is annotated with @InitiatingFlow and theAcceptor is annotated with @InitiatedBy(Initiator.class). This means that once the Initiator flow has made its first contact with a peer node, the Acceptor flow is automatically instantiated on the peer node:
- At this point, the 2 flow instances are connected to each other by a
FlowSession, akin to a session id identifying the 1-to-1 link. - If the initiator makes contact with more than 1 peer node, then there are as many 1-to-1 sessions as there are peer nodes, with 1 responder flow instance per peer node.
- Additionally, if the
Initiatorever needs to ask more than one piece of information from theAcceptorflow, it can keep asking for those pieces on the same session. TheAcceptorflow would, of course, need to be coded so that it also receives and sends the information in accordance with the choreography coded in theInitiator. - Even while 2 peer nodes are linked by a session between 1 instance of an initiator flow and 1 instance of a responder flow, nothing prevents the same 2 peer nodes from creating a new session between 2 flow instances of the same type or of different types.
For the avoidance of doubt, know that not all flows come in pairs. Indeed, you may create a so called unary flow to make a calculation, query and return local data or query an external API. Additionally, even if flows come in pairs, there are 2 types of pairs:
- Auto-initiated session pair, as seen above, whereby the flows have been annotated with
@InitiatingFlowand@InitiatedBy(XX.class). - Inlined or free-riding pair, whereby the responder is not automatically awoken by the initiator, but instead it is the responsibility of the encapsulating flows to both launch the initiator and the responder at the right point in the choreography, as you’ll see with
CollectSignaturesFlow. Inlined flows always take at least one flow session among their constructor parameters.
A productive way to look at flows is as small pieces of a workflow that can be composed or chained together in order to achieve a larger orchestration.
Another point is that, in this example, the Initiator and the Acceptor flows have been coded together by the same developer, and distributed to interested parties. In real life, each party would subclass these flows in order to add custom, and private, code for their internal processes, while sticking to the agreed common choreography defined by the base class.
ExampleFlow.Initiator flow
Here, the initiator flow creates the full transaction proposal and then only sends it for acceptance. So the flow:
-
Creates the
IOUState. Notice thatme = getOurIdentity()is placed in thelenderposition. So really this flow has to be started by the lender. The code could make this a bit more explicit, for instance, when using Kotlin’s named arguments, like so:val iouState = IOUState( value = iouValue, lender = serviceHub.myInfo.legalIdentities.first(), borrower = otherParty) -
Creates a command with the required signers.
-
Associates the
IOUStatewith theIOUContract. This is where the state is actually pointing to the contract that will verify the transaction on its behalf. In fact, theBelongsToContractannotation allows the compiler to add cross-checks in order to minimize mistakes. There is theStateAndContractclass that you could use too in order to achieve the same. -
Verifies locally that the transaction is valid. Do you remember that the contract does not check for the presence of signatures, only of expected signers? Here the contract accepts the transaction before it has been signed.
-
Signs it with the lender’s signature.
-
Opens a peer-to-peer session with the borrower, without sending anything yet. The remote peer will be notified only when an actual request is made.
-
Asks for signatures from the borrower. This triggers a checkpoint on the initiating peer as the initiating peer awaits a fully signed transaction.
-
At some point it receives the fully signed transaction and carries on.
-
Finalizes, without communicating with the notary in this case because there are no input states, by sending the transaction to the borrower. You could choose to send it to more than the
participants, for instance to a regulator or observer.
There are quite a number of steps although they should make sense. Notice how, when asking for signatures, it specifically calls CollectSignaturesFlow, which is an inlined flow, not a @InitiatingFlow. This means that the Acceptor flow will have to respond with the responder SignTransactionFlow at the appropriate position in the choreographed sequence.
CollectSignaturesFlow asks you to pass val sessionsToCollectFrom: Collection<FlowSession> the list of sessions to use. Why is that? Can’t it not deduce it on itself? You see, CollectSignaturesFlow is not @Initiating. When you are in an @Initiating flow, and you do initiateFlow(bob) the first time, you always have the assurance that you just created a new session. That is not the case for inlined flows, like here, which are called from another flow. In this situation, a session may already have been created, so, calling initiateFlow(bob) will fail. Therefore these flows have to piggy-back on existing sessions, and that is why, if your inlined flow has a responder, it has to take the pre-existing sessions in its constructor.
ExampleFlow.Acceptor flow
As mentioned earlier, this flow is annotated with @InitiatedBy so that it is bound to and responds to Initiator flows, and its sub classes. If you recall, the initiator initiates 2 actions that involve the responder:
- It calls
CollectSignaturesFlow. - And
FinalityFlow.
Neither “sub” flow is annotated with any @InitiatedBy, so the responder, as part of its run, has to launch their respective responder actions, which, in order, are none other than:
- Calling
SignTransactionFlow, which conditionally adds a signature to the transaction, - and
ReceiveFinalityFlow, which conditionally saves the transaction to the vault.
Fear not, there is no guess-work involved here. If you go to:
CollectSignaturesFlow, you will find the responder on the same page. The JavaDoc even mentions it.FinalityFlow, the responder is documented there too.
As you may have suspected, it is always a good decision to keep the flow pair in a single file.
Security considerations
Now, this ExampleFlow.Acceptor flow is automatically spawned when a request arrives. That is a potential security risk. What if this acceptor flow, that you think remains dormant on your node, suddenly accepts any lending proposition that arrives? Will you end up owing money to random peers on the network? Owing money to random peers is not desirable but is not a breakage of the ledger layer, so the contract does not protect you from that. It is the flow’s responsibility. Does this example flow protect you from that risk?
Generally, with a traditional off-ledger IOU, a human borrower will want to screen what to accept, via an inbox mechanism. That would require a checkpoint that waits for human input. However, Corda is designed to accommodate rapid, high-volume transactions between counterparties; and so this wait-for-approval pattern is not supported by default. Instead, to facilitate constraints specific to an individual party there is a checkTransaction function, which must be overridden any time a SignTransactionFlow is instantiated. In this case, the checks are rudimentary:
- There is one
IOUStatein Java, or exactly one in Kotlin. - The borrowed amount is not too high.
Very simple, and still dangerous, as the borrower could end up owing 100 many times over. After all, this project is meant as an example, and a decision was made not to overburden the beginning developer with this exercise. However, so as not to leave you with the impression that it is impossible to implement a safe responder flow, here are 2 hand-waving ways that can reasonably close this loophole:
- Use the ledger and allow the borrower to create an “IOU proposal” state that:
- has the same mentions as the eventual IOU,
- “is signed” either only by the borrower or only by the lender,
- and has to be consumed, and verified so by a modified IOU contract, when issuing the IOU proper.
Only after the proposal has been issued, the party that did not sign the proposal can, and needs to, sign off on the transaction that consumes the proposal and creates the IOU proper for the mentioned amount. In effect, the need for 2 signatures was split into 2 transactions initiated by each interested party. The fact that each party initiated a transaction is enough assurance that they intended the action to happen in the first place.
2. Use a private database, where the borrower:
- creates a private table with the allowed lenders and amounts
- sub-classes the
Acceptorwhere:
* thecheckTransactionfunction atomically:- checks the allowance in the private table, and rejects if there are any inconsistencies,
- and soft-locks the matching allowance row in the private table
* then, after the finalisation, it deletes the soft-locked valid row.
In effect, what is achieved here is the borrower hiding its proposal, which is a part of its decision making, while exposing to the world a simple ledger mechanism.
You will see both situations in later chapters.
For the avoidance of doubt, in the Acceptor’s flow, the choreographed point is in action where subFlow is called. The previous instantiation is just that, an instantiation. When called with subFlow, the SignTransactionFlow picks up from there on its own, it:
- Performs the extra checks.
- Signs the transaction.
- But does not save it into its vault just yet.
- Sends the signed transaction back to the
Initiator.
Sending the transaction back to the Initiator does not involve any checkpointing. Why? You learned in an earlier chapter that Corda uses a queue system. Sending the transaction means putting this transaction in the outbound queue, and moving on. When this is done, the flow is back into the Acceptor’s main logic, where the next step is ReceiveFinalityFlow, which is in essence a receive command. Here the flow is checkpointed until the transaction is received again from the Initiator, a.k.a. when there is data in the inbound queue. To repeat, the checkpointing happens at the start of ReceiveFinalityFlow, not at the end of SignTransactionFlow.
Finalisation is called explicitly. This is a feature, not a bug. Thanks to that, you can use flows to communicate between nodes, even if the purpose of the communication is not to create an eventual transaction. Additionally, you will not be DoS’d with a flood of irrelevant transactions going to your vault for no reason.
Conclusion
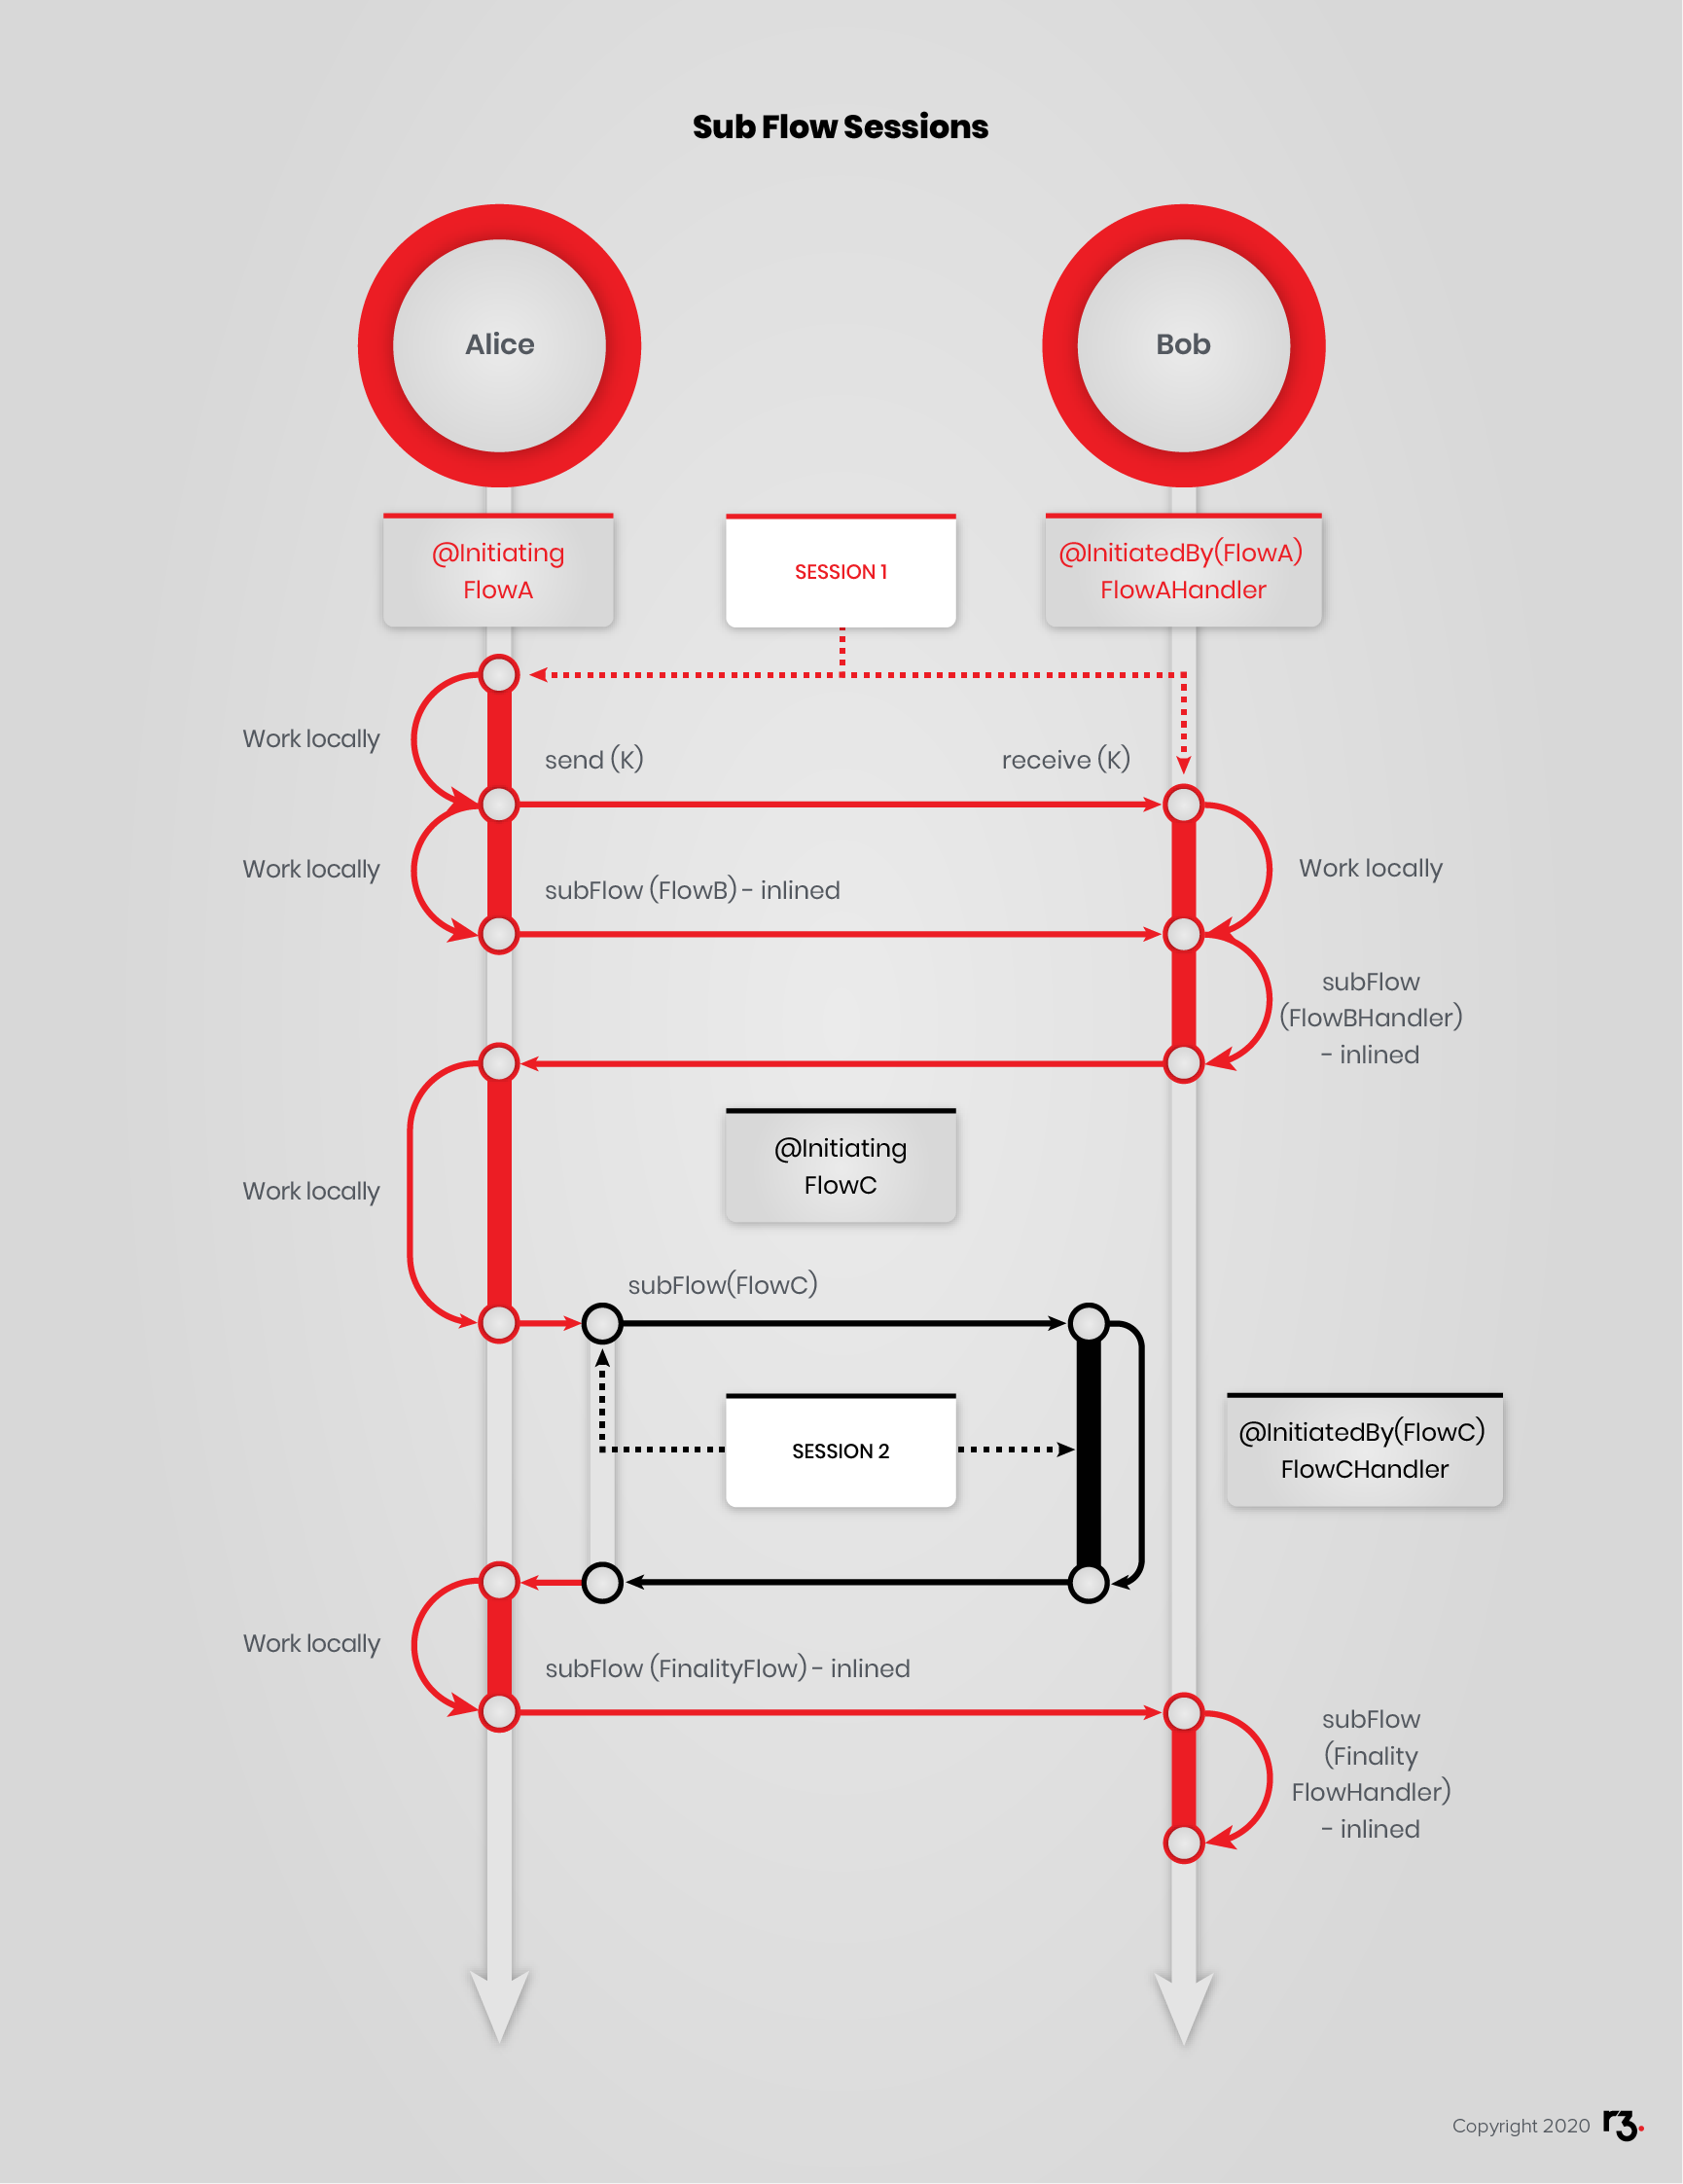
To recap some of the ideas explained above, below is a swim-lane diagram that displays a possible interaction between 2 peers:
@Initiating FlowA, launched on Alice, initiatessession1with Bob.FlowAdoes asend, withinsession1, and keeps working locally.@InitiatedBy(FlowA) FlowAHandleris triggered on Bob withinsession1.FlowAHandlerdoes areceive, on Bob withinsession1.FlowAcalls (subFlow) inlinedFlowBon Alice withinsession1.FlowBhas a handler, soFlowAHandleris coded to callFlowBHandler, on Bob withinsession1.- When
FlowBHandlersends back toFlowA,FlowAdoes some more work then calls@Initiating FlowC, on Alice withinsession1. - This creates a new session on Alice,
session2, within whichFlowCruns. @InitiatedBy(FlowC) FlowCHandleris triggered on Bob withinsession2.- When
FlowCHandlersends back toFlowCon Alice withinsession2,FlowCends and the flow returns toFlowAon Alice withinsession1. FlowAdoes some more work, then calls inlinedFinalityFlowon Alice withinsession1.- That’s why
FlowAHandlerexplicitly callsFinalityFlowHandler, on Bob withinsession1.
Ok, that was quite the code walkthrough. In the next chapter you will run the project, interact with it, and check back the code when necessary.